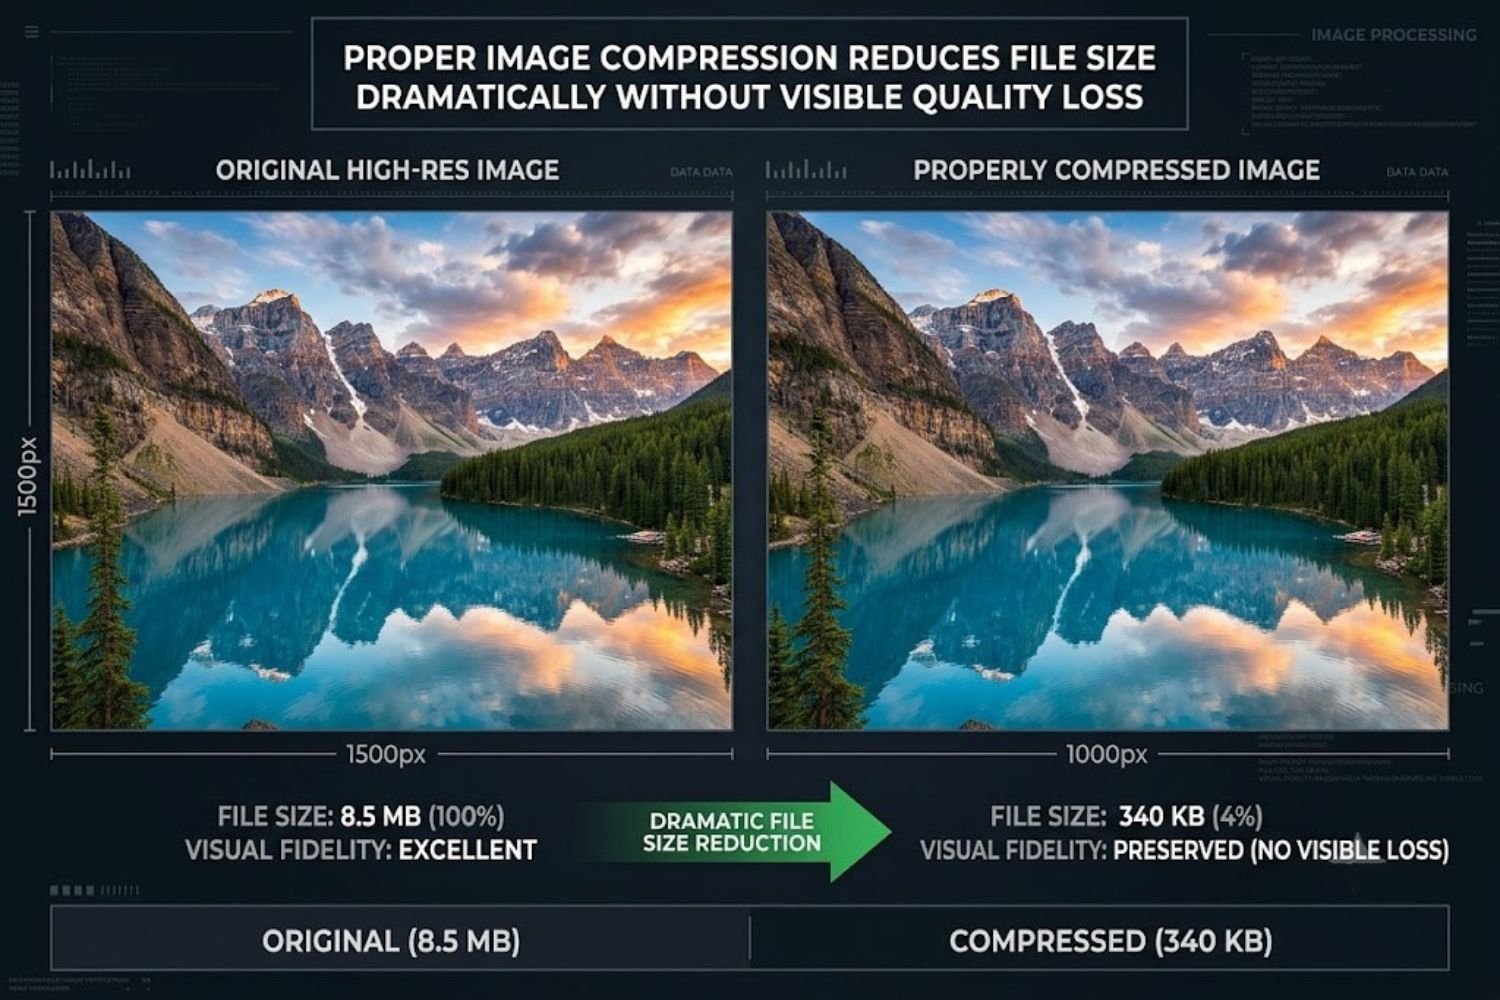
Uncompressed images kill website performance. A single high-resolution photo can easily weigh 5–10 MB, tanking page load speed and frustrating users on mobile connections.
The solution? Image compression.
Yet most people treat it as a one-step process: upload an image, download a smaller file, done. That approach wastes potential gains—and often ruins image quality in the process.
This guide reveals what actually happens inside compression algorithms, why most people choose the wrong compression type, and how to optimize images for speed without sacrificing visual appeal.
What Is an Image Compressor? (Definition & Overview)
An image compressor is software or an algorithm that reduces an image file’s size by removing unnecessary data while maintaining visual quality.
Image compressors work by analyzing pixel data and eliminating redundant information. Different compression methods target different types of redundancy, which is why your choice of algorithm directly impacts your results.
Think of it this way: an uncompressed image stores every pixel’s exact color information. A compressor notices patterns—areas of uniform color, repeating textures, details human eyes can’t perceive—and discards that information strategically.
Why Image Compression Matters
Uncompressed images create three problems:
Storage: High-resolution photos consume gigabytes of server space, increasing infrastructure costs.
Bandwidth: Users downloading large files waste data and money, especially on mobile plans.
Speed: Google’s algorithm prioritizes fast-loading pages. Uncompressed images directly harm your search rankings and user experience metrics.
A single 5 MB image compressed to 500 KB doesn’t just feel faster—it is faster, reducing page load time by seconds. That difference compounds across dozens of images.
How Compression Algorithms Work
Compression algorithms scan pixel data for patterns and redundancy, then encode that data more efficiently.
Here’s the basic process:
- Analysis: The algorithm reads the image’s color information and spatial patterns.
- Encoding: Repetitive data is replaced with references (e.g., “400 consecutive red pixels” instead of storing each pixel individually).
- Output: The compressed file contains only the encoded data plus metadata.
The key difference between compression types is what data gets removed and how aggressively.
Lossy vs. Lossless Compression: The Core Difference
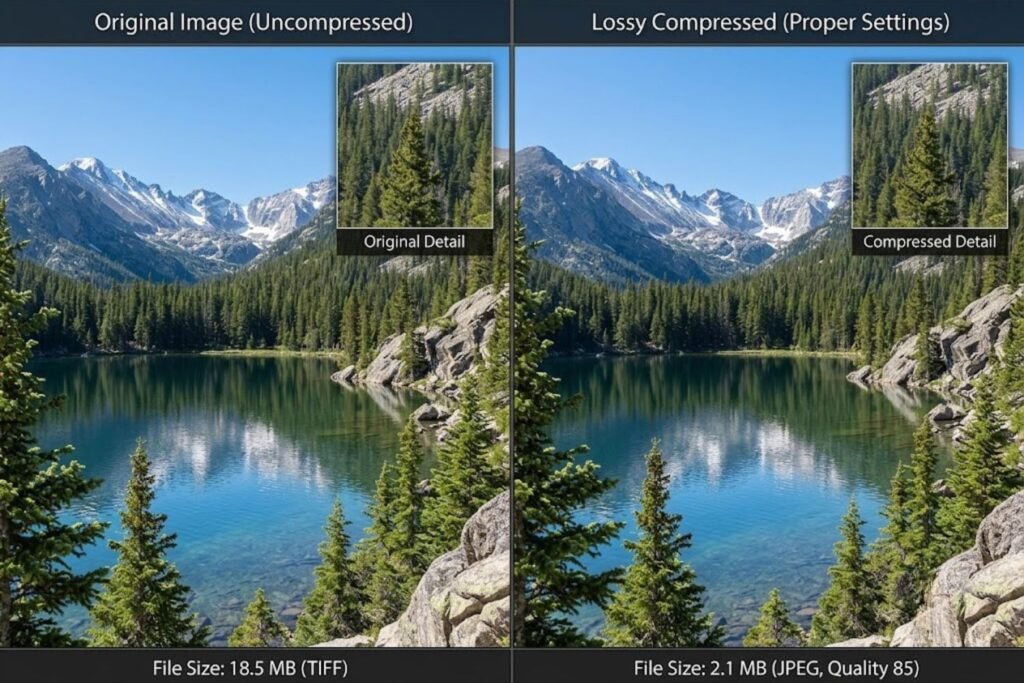
Lossless compression removes redundant data—information the algorithm can reconstruct perfectly during decompression. No visual information is lost.
Lossy compression removes non-essential data—details humans typically can’t perceive. The file becomes smaller, but the decompressed image is slightly different from the original.
The tradeoff:
- Lossless: Larger file size, perfect quality, suitable for graphics and logos
- Lossy: Smaller file size, minor quality loss, suitable for photographs
Understanding Compression Algorithms
Lossy Compression Explained
Lossy compression removes data based on how human vision works. Your eyes are sensitive to brightness changes but less sensitive to subtle color shifts. Lossy algorithms exploit this.
How It Works:
The JPEG format, the most common lossy standard, uses a process called DCT (Discrete Cosine Transform). It divides an image into 8×8 pixel blocks and analyzes color and brightness separately. High-frequency color data (fine color gradations) gets discarded first, while brightness edges (which humans notice) are preserved.
Practical Example:
A photograph of a forest loses unnoticeable color subtleties in the leaves but keeps the sharp edges of tree trunks and sky. File size drops from 4 MB to 400 KB, but the viewer sees no obvious difference.
When to Use Lossy:
- Photographs
- Complex scenes with many colors
- Web images where speed matters more than perfection
- Thumbnails and preview images
Lossless Compression Explained
Lossless compression is smarter about redundancy. Instead of throwing away data, it rewrites it more efficiently.
How It Works:
PNG uses a technique called DEFLATE, which scans for repeating patterns and replaces them with references. If your image contains 200 consecutive blue pixels, the algorithm might replace that sequence with “200× blue” instead of storing each pixel separately.
Practical Example:
A logo with solid colors and sharp edges compresses dramatically with lossless algorithms. A 1 MB logo might compress to 200 KB because large areas of uniform color compress extremely well.
When to Use Lossless:
- Logos and graphics
- Screenshots
- Images with text
- Artwork requiring pixel-perfect quality
- Archives where quality is non-negotiable
Modern Formats: WebP and AVIF
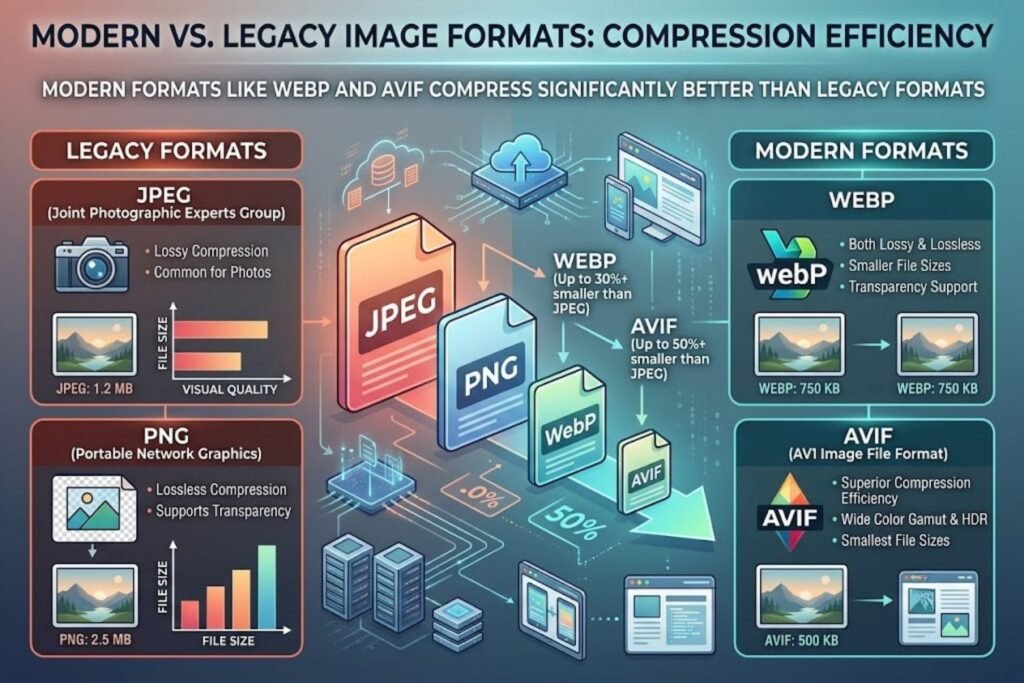
JPEG and PNG dominated for decades, but newer formats compress more efficiently by combining advanced algorithms with modern techniques.
WebP (developed by Google) uses both lossy and lossless modes and typically achieves 25–35% better compression than JPEG. A photo that’s 100 KB in JPEG might be 70 KB in WebP.
AVIF is even more aggressive, sometimes compressing 50%+ better than JPEG. A 100 KB JPEG becomes 50 KB in AVIF.
The Trade-off: Browser support. JPEG and PNG work everywhere. WebP works in most modern browsers but not all older devices. AVIF support is still growing.
Strategic Approach: Serve WebP or AVIF to modern browsers, fall back to JPEG for older devices. This “progressive enhancement” gives most users smaller, faster images.
Common Image Compression Mistakes (and How to Avoid Them)
Mistake 1: Over-Compressing Images
The biggest error: cranking compression to maximum and destroying image quality.
Many people push JPEG quality to 60% or lower, thinking “smaller is better.” The result looks awful—visible artifacts, splotchy colors, and washed-out details.
The Fix: Test compression at different settings. For photos, JPEG quality of 75–85% is typically invisible to human eyes but cuts file size dramatically. Use a side-by-side comparison tool to verify quality at each level.
Mistake 2: Ignoring Format Selection
Using PNG for photographs or JPEG for graphics wastes file size.
A 3 MB photograph saved as PNG might compress to only 1.8 MB (poor compression efficiency) because PNG’s lossless algorithm isn’t optimized for complex color data. The same photo as JPEG might compress to 300 KB.
Conversely, a logo saved as JPEG creates “compression artifacts”—blurry edges and color fringing—because JPEG isn’t designed for solid colors and sharp lines.
The Fix: Match the format to the image content:
- Photos → JPEG or WebP
- Graphics/Logos → PNG or WebP
- Complex imagery → AVIF
Mistake 3: Compressing Already Compressed Images
Re-compressing a JPEG loses more quality each time. JPEG is lossy—decompressing and recompressing destroys data repeatedly.
If you download a JPEG, edit it, and save it again as JPEG, the second save is lower quality than the first.
The Fix: Always compress from the original uncompressed source. If you only have a JPEG, use lossless formats like PNG for edits to avoid additional quality loss.
Image Compression Best Practices
Optimal Compression Settings for Different Use Cases
Web Images (General):
- Format: WebP (primary), JPEG fallback
- JPEG Quality: 75–80%
- Target Size: Under 200 KB for full-width images
Thumbnails:
- Format: WebP
- Quality: 60–70% (small images tolerate lower quality)
- Target Size: Under 50 KB
High-Quality Displays (Desktop):
- Format: AVIF or WebP
- Quality: 85–90%
- Target Size: Under 500 KB
Mobile Images:
- Format: WebP or AVIF
- Quality: 70–75% (smaller screens hide compression)
- Target Size: Under 150 KB
Archival/Professional:
- Format: PNG (lossless)
- Quality: Maximum
- Target Size: Not a concern; quality is priority
Batch Processing Workflows
Compressing one image at a time is inefficient. Use batch tools to automate the process:
- ImageMagick (command-line): Process hundreds of images with a single script
- Squoosh (Web): Drag multiple images at once
- XnConvert: Convert and compress entire folders
- Automated workflows: Use CI/CD pipelines to compress images as they’re uploaded
A typical script might convert all JPEGs to WebP, resize oversized images, and generate thumbnails automatically.
Maintaining Quality While Reducing File Size
The secret: compression is a sliding scale, not binary.
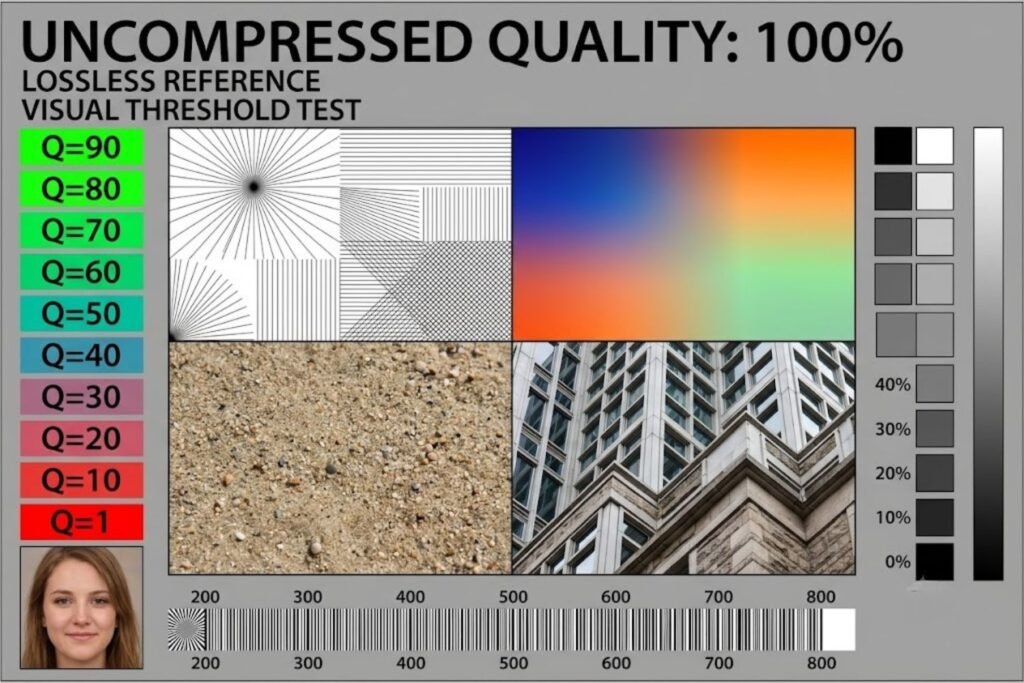
Test your images at multiple quality levels (60%, 70%, 80%, 90%) and compare visually. Often, a human can’t distinguish 75% from 90%, but the file size difference is significant.
Use comparison tools like:
- Squoosh (squoosh.app): Side-by-side quality comparison
- TinyPNG: Visual quality comparison
- FileSize Analyzer: Track compression ratios across formats
Compression Tools & When to Use Them
Online Tools vs. Desktop Software
Online Tools (Best For):
- Quick, one-off compression
- No installation required
- Cross-platform (works on Mac, Windows, Linux)
- Examples: Squoosh, TinyPNG, Compressor.io
- Downside: Privacy concerns with file uploads; bandwidth limits
Desktop Software (Best For):
- Batch processing large libraries
- Privacy (files never leave your computer)
- Advanced customization
- Examples: ImageOptim (Mac), Riot (Windows), XnConvert (cross-platform)
- Downside: Installation and learning curve
Automated Pipelines (Best For):
- Production environments
- Large-scale image handling
- Integration with content management systems
- Examples: ImageMagick scripts, WordPress plugins, CDN-based optimization (Cloudinary, Imgix)
Automation Strategies
Modern workflows compress images automatically:
- On Upload: When users upload images to your website, compression happens server-side automatically.
- On Publish: Content management systems (like WordPress) can automatically generate multiple sizes and formats.
- On Request: CDN services (like Cloudflare Image Optimization) compress images on-the-fly based on the visitor’s device.
- Build-Time: Static site generators (Gatsby, Next.js) compress images as part of the build process.
This removes the manual step entirely.
Image Compression Impact on Web Performance
SEO Benefits of Image Optimization
Google’s Core Web Vitals include Largest Contentful Paint (LCP) and Cumulative Layout Shift (CLS)—both affected by image loading speed.
Compressed images improve LCP directly:
- Smaller files = faster downloads
- Faster downloads = quicker visual completeness
- Faster LCP = higher ranking potential
Studies show that pages with optimized images rank higher than identical pages with unoptimized images. The difference can be 5–10% CTR improvement.
User Experience Improvements
Beyond SEO, compression directly impacts user experience:
- Mobile users: Smaller images load faster on 4G/5G, reducing data consumption
- Bounce rates: Fast-loading pages have lower bounce rates
- Conversion rates: Faster pages convert better (Amazon found that 100 ms of latency costs 1% of sales)
- Accessibility: Faster-loading sites are more accessible to users on slow connections or with disabilities requiring longer load times
FAQ
Q1: What file size should my images be?
A: Full-width web images should be under 200 KB. Thumbnails under 50 KB. Mobile images under 150 KB. These are guidelines, not rules—test based on your specific use case.
Q2: Does compressing images reduce quality?
A: Lossy compression removes imperceptible data, so quality loss is usually invisible. Lossless compression removes no quality at all. Both reduce file size without noticeable degradation at proper settings.
Q3: Is WebP better than JPEG?
A: WebP typically compresses 25–35% better than JPEG with similar visual quality. But JPEG has wider browser support. Ideal strategy: serve WebP to modern browsers, JPEG to older devices.
Q4: Can I re-compress an already compressed image?
A: Re-compressing lossy formats (JPEG) causes quality loss each time. Always compress from the original uncompressed source.
Q5: What’s the difference between image compression and image resizing?
A: Resizing changes image dimensions (e.g., 4000×3000 → 1200×900). Compression reduces file size without changing dimensions. Both improve performance; both are worth doing.
Q6: How do I compress images in bulk?
A: Use batch tools like ImageMagick, XnConvert, or online services that accept multiple files. Automation pipelines compress automatically during upload or build time.
Q7: Should I compress before or after editing?
A: Compress as the final step. Editing an already-compressed lossy image causes quality loss. Always compress from the original.
Q8: Is PNG always lossless?
A: Yes. PNG always uses lossless compression. JPEG uses lossy compression. WebP and AVIF can use either, depending on settings.
Q9: Do I need different image sizes for different devices?
A: Yes. Serving a 4000×3000 image to a mobile device wastes bandwidth. Use responsive image techniques to serve optimized sizes per device.
Q10: What’s AVIF, and should I use it?
A: AVIF is a modern format compressing 40–60% better than JPEG. Browser support is still growing, so use it alongside JPEG fallbacks for best results.
Q11: Does compression affect accessibility?
A: Proper compression doesn’t affect alt text or screen readers. Overly aggressive compression that makes images unrecognizable could harm accessibility perception, but well-compressed images don’t.
Q12: How much does image compression improve page speed?
A: Depends on your current setup. If images are 60% of page weight, optimized compression might improve load time 30–50%. For image-heavy sites, compression is often the biggest performance win.