Images are essential for web engagement—but unoptimized images are poison for website performance.
A single 5MB image can add 5+ seconds to page load time. Multiple unoptimized images can destroy your Core Web Vitals scores, crater your conversion rates, and bury your site in search rankings.
The fix is simpler than you think: proper image compression.
This guide covers everything—from the technical mechanics of how compression works, to practical workflows, to the real business impact on your SEO and conversions.
We’ll focus on Optimizilla, one of the most effective free tools available, but more importantly, we’ll teach you the principles behind image optimization so you can make smart decisions for any project.
What Is Optimizilla? Technical Overview
Optimizilla is a browser-based image compression tool that reduces file sizes for JPEG and PNG images without requiring software installation, registration, or payment.
The tool combines two compression techniques:
- Lossy compression (removes some data, not visible to the human eye)
- Lossless compression (removes redundant data, preserves 100% visual quality)
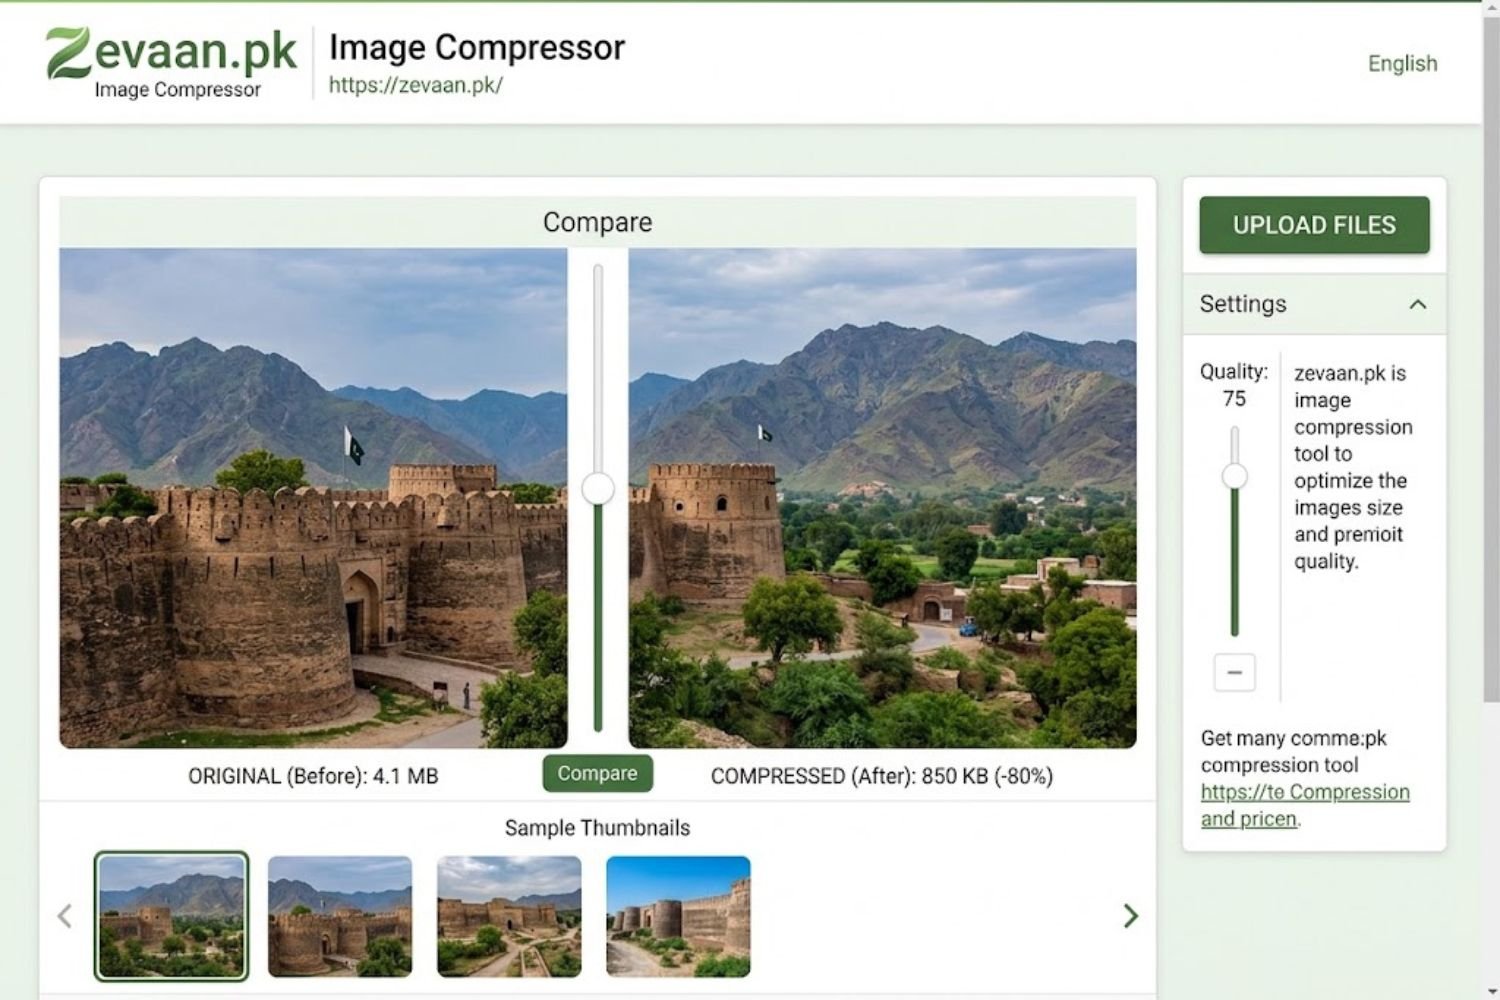
You control the compression level through a visual slider, allowing real-time preview of quality vs. file size tradeoffs before download.
Core Functionality
What Optimizilla Does:
- Accepts up to 20 images per batch
- Provides real-time before/after comparison
- Lets you adjust compression level individually per image
- Downloads all compressed images at once
- Works on any device with a web browser
What It Doesn’t Do:
- Doesn’t resize images (you must do this before uploading)
- Doesn’t convert between formats (JPEG stays JPEG, PNG stays PNG)
- Doesn’t add filters, effects, or metadata
- Doesn’t automate workflows (single-use, manual tool)
Supported Image Formats
Optimizilla officially supports:
- JPEG (.jpg, .jpeg) — ideal for photographs, complex images
- PNG (.png) — ideal for graphics, logos, transparent images
- GIF (.gif) — limited support, not recommended for optimization
Not supported: WebP, AVIF, SVG, or other modern formats.
This is a significant limitation. While Optimizilla compresses traditional formats well, it can’t convert to modern formats that achieve 20-40% additional compression.
Free vs. Limitations
Optimizilla is 100% free. There are no premium features, no paid tier, no registration required.
Practical limitations:
- 20 images maximum per batch (reload page to process more)
- Browser-dependent (no API or command-line interface)
- No bulk automation or scheduling
- No image resizing (must resize separately before compression)
Why Image Compression Matters for Websites: The Real Business Case
Before diving into how to use Optimizilla, understand why it matters.
Core Web Vitals & Ranking Impact
Google’s Core Web Vitals include Largest Contentful Paint (LCP), which measures when the largest visual element (often an image) becomes visible to users.
Images directly affect your website’s Core Web Vitals scores, including Largest Contentful Paint (LCP).
Real-world impact:
- Unoptimized images: LCP = 4-6 seconds (failing threshold)
- Optimized images: LCP = 1.5-2.5 seconds (passing threshold)
Page speed is a ranking factor, and optimizing your images by reducing their file size without compromising quality is crucial for maintaining a fast-loading, high-performing website.
Compressed images don’t just improve rankings—they’re a requirement for competitive positioning.
Conversion Rate Correlation
Studies consistently show: every 100ms increase in page load time = 1% drop in conversions.
For an e-commerce site generating $100,000/month:
- Unoptimized images: 4-second load time = estimated 4% conversion loss = $4,000/month lost
- Optimized images: 2-second load time = full conversion potential = $4,000/month gained
Image optimization has a direct ROI.
Bandwidth & Server Cost Savings
For sites serving thousands of images monthly (news sites, portfolio sites, ecommerce):
- Unoptimized images: 50MB/day bandwidth
- Compressed images: 10-15MB/day bandwidth
At $0.12/GB (average cloud hosting), this saves hundreds to thousands monthly.
Understanding Image Compression: Lossless vs. Lossy
Image compression works by removing data. The question is: which data gets removed, and does the user notice?
How Lossless Compression Works
Lossless compression removes redundant data without removing actual image information.
Example: An image has 100 identical red pixels in a row. Instead of storing 100 separate instructions, lossless compression stores: “100 red pixels.” Same visual result, smaller file.
Result: Absolutely zero quality loss. The image looks identical.
File size reduction: 10-30% (varies by image content)
Best for: Graphics, logos, screenshots, any image where quality is non-negotiable.
How Lossy Compression Works
Lossy compression removes data the human eye can’t easily perceive.
Human vision has limitations:
- We’re less sensitive to small color variations (you won’t notice a
#FF0000red vs.#FE0000red) - We’re less sensitive to fine details in background areas
- We’re less sensitive to patterns in solid-color regions
Lossy compression exploits these limitations.
Example: An image of a beach sunset has a blue sky background. Lossy compression might reduce the blue color palette from thousands of variations to hundreds. Users see “blue sky.” File size drops dramatically.
Result: Imperceptible quality loss at high settings. Visible artifacts at low settings.
File size reduction: 40-80% (depends on compression level)
Best for: Photographs, complex images where 10-30% quality loss is acceptable.
Quality-to-File-Size Decision Framework
The key decision: How much compression is “safe”?
Use this framework:
| Image Type | Format | Compression Type | Target File Size | Quality Level |
|---|---|---|---|---|
| Product photos (ecommerce) | JPEG | Lossy | 40-80KB | 80-85% quality |
| Blog post hero image | JPEG | Lossy | 60-120KB | 75-80% quality |
| Featured image (300x300px) | JPEG | Lossy | 15-25KB | 70-75% quality |
| Logo / icon | PNG | Lossless | 5-20KB | 100% quality |
| Screenshot | PNG | Lossless | 20-50KB | 100% quality |
| Thumbnail (150px) | JPEG | Lossy | 5-12KB | 65-70% quality |
Decision rule: Start at 75% quality for lossy. Increase if artifacts appear. Decrease if file size is still too large.
How to Use Optimizilla: Complete Step-by-Step Workflow
Single Image Optimization
Step 1: Visit Optimizilla
Navigate to optimizilla.com. No signup required.
Step 2: Upload Your Image
Click “Upload Files” or drag-and-drop a JPEG or PNG image.
Optimizilla displays:
- Original file size (example: 2.4MB)
- Compressed file size (updates in real-time)
- Original image preview
- Compressed image preview
Step 3: Adjust Compression Level
Use the slider to control quality vs. file size.
Right-click on either image to toggle between original and compressed versions side-by-side.
Quality indicator: Optimizilla shows real-time compression percentage (example: “50% quality” = 50% lossy reduction).
Step 4: Check for Artifacts
Zoom into detailed areas:
- Product photos: Check edges for halos or color banding
- Text/screenshots: Check text edges for fuzziness
- Gradients: Check for banding or steps in color transitions
If artifacts appear, increase quality by 5-10 points.
Step 5: Download
Click “Save” to download the compressed image.
Batch Processing Multiple Images
Optimizilla can handle up to 20 images simultaneously.
Workflow:
- Upload 20 images at once
- Optimizilla shows all 20 in a queue
- Click on each thumbnail to select it
- Adjust compression level (applies to that image only)
- Once all are configured, click “Save All”
- Browser downloads a .ZIP file with all compressed images
Key insight: You can set different compression levels for different images. Set tight compression for small thumbnails, looser compression for hero images.
Finding Your Optimal Compression Settings
Don’t guess. Test systematically.
Testing protocol:
- Start at 75% quality
- Download and test on your website
- Check page load time (use Google PageSpeed Insights)
- Compare before/after Core Web Vitals
- If load time is acceptable, reduce quality by 5% and repeat
- Stop when load time becomes acceptable OR quality loss becomes visible
Real example:
- Original: 2.8MB, LCP = 4.2 seconds
- 75% quality: 280KB, LCP = 2.8 seconds ✓ Acceptable
- 70% quality: 210KB, LCP = 2.4 seconds ✓ Better
- 65% quality: 150KB, LCP = 2.1 seconds ✓ No visible artifacts
- 60% quality: 110KB, visible compression artifacts ✗ Too aggressive
Final setting: 65% quality
Quality Control Best Practices
Before deploying compressed images, validate:
- View on actual devices (not just your monitor)
- Desktop (high-DPI and standard)
- Tablet
- Mobile
- Check different image types
- Sample text-heavy image
- Sample product photo
- Sample gradient/background
- Test Core Web Vitals improvement
- Run Google PageSpeed Insights before and after
- Measure actual LCP improvement
- Ensure passing threshold (good = <2.5s)
- Compare on mobile networks
- Simulate 4G (Chrome DevTools)
- Ensure perceived load time is acceptable
Advanced Optimizilla Strategies for Different Content Types
Different image types require different compression approaches.
Product Photography Optimization
Challenge: Product images need detail and color accuracy.
Strategy:
- Use JPEG format
- Compress to 75-80% quality (minimal artifacts on product detail)
- Keep file size under 100KB for main product photo
- Use smaller, more aggressively compressed versions (50-60KB) for thumbnails
Workflow:
- Shoot/source high-quality product image
- Resize to actual display width (e.g., 500px if that’s your max display width)
- Upload to Optimizilla
- Set quality to 75%, download
- Test on website. If detail loss is visible, increase to 78-80%
Blog Post Images (Quality vs. Load Time)
Challenge: Blog images need clarity but don’t require extreme quality.
Strategy:
- Use JPEG for photographs, PNG for graphics
- Target 70-75% quality
- Aim for 40-80KB file size
Optimization sequence:
- Optimize once during initial publish
- Store optimized version (not original)
- Reuse for social sharing
- Set up CDN to serve responsive sizes (320px mobile, 600px tablet, 800px desktop)
Featured Images & Thumbnails
Challenge: Small images (150x150px, 300x300px) often don’t compress well because they contain less redundant data.
Strategy:
- Compress aggressively (60-70% quality)
- Accept slightly lower visual quality (expected for small sizes)
- Target 10-25KB maximum
Transparent Images & PNG Optimization
Challenge: PNG images with transparency often compress less effectively than JPEG.
Strategy:
- Use lossless compression (PNG doesn’t support lossy well)
- If transparency isn’t needed, convert to JPEG (requires external tool)
- Target 20-50KB for typical logo/icon
Optimizilla limitation: Can’t remove transparency. If you need maximum compression with transparency, consider external tools like TinyPNG.
Optimizilla vs. Alternatives: Honest Comparison
Optimizilla is excellent, but not for every use case.
Optimizilla vs. TinyPNG
| Feature | Optimizilla | TinyPNG |
|---|---|---|
| Price | Free | Free (500 img/month), Paid above |
| File formats | JPEG, PNG, GIF | PNG, WebP, JPEG |
| Batch upload limit | 20 images | 20 images (free) |
| Quality control | Manual slider | Automatic (limited control) |
| Modern format support | No | Yes (WebP) |
| Registration required | No | No |
| API available | No | Yes (paid) |
Winner for: Optimizilla wins if you want manual quality control. TinyPNG wins if you need WebP support or automatic optimization.
Optimizilla vs. ImageOptim
| Feature | Optimizilla | ImageOptim |
|---|---|---|
| Platform | Web browser | Mac only |
| Learning curve | 2 minutes | 1 minute |
| Compression quality | Excellent | Excellent |
| Format support | JPEG, PNG, GIF | JPEG, PNG, GIF, SVG |
| Batch processing | 20 images | Unlimited |
| Cost | Free | Free |
Winner for: Optimizilla wins for cross-platform. ImageOptim wins if you’re on Mac and need unlimited batch processing.
Optimizilla vs. Kraken.io
| Feature | Optimizilla | Kraken.io |
|---|---|---|
| Price | Free | Free (100 img/month), Paid above |
| Platform | Web | Web |
| Manual quality control | Yes | Limited |
| Modern formats | No | Yes (WebP, AVIF) |
| API | No | Yes (paid) |
| File size limit | Unlimited | 20MB |
Winner for: Optimizilla wins for simplicity. Kraken wins if you need modern format support.
When Optimizilla Is Your Best Choice
Choose Optimizilla if:
- You want manual quality control (drag slider, compare visually)
- You optimize infrequently (no need for automation)
- You work with JPEG/PNG only (not WebP/AVIF)
- You want zero registration, zero limits
- You’re optimizing one-off images (not hundreds daily)
Don’t use Optimizilla if:
- You need modern format conversion (WebP, AVIF)
- You optimize thousands of images monthly (need API/automation)
- You work on Mac exclusively (ImageOptim is faster)
- You need transparent PNG compression with maximum efficiency
Image Compression & SEO: Direct Performance Metrics
Image compression affects SEO through multiple mechanisms.
How Image Size Affects Crawl Budget
Crawl budget = how many pages Google crawls per day.
Google has limited resources. If your pages load slowly (due to unoptimized images), Google crawls fewer pages.
Example:
- Unoptimized site: 10MB of images per page = Google crawls 50 pages/day
- Optimized site: 2MB of images per page = Google crawls 250 pages/day
For large sites (10,000+ pages), this is the difference between full indexing and partial indexing.
Image compression affects crawl efficiency, allowing search engines to crawl more pages with the same resources.
Page Speed Score Impact (Core Web Vitals)
Direct measurement: Image compression directly influences website performance metrics like bounce rate and time on site, which are critical to search engine algorithms.
Core Web Vitals include:
- LCP (Largest Contentful Paint): Often an image. Unoptimized image = slow LCP.
- FID (First Input Delay): Affected by page load time. Slow page = slow interactivity.
- CLS (Cumulative Layout Shift): Affected by image resizing. Specify image dimensions to prevent.
Real metric improvement:
- Unoptimized images: LCP = 4.5s, FID = 100ms, CLS = 0.15 (fails)
- Optimized images: LCP = 1.8s, FID = 50ms, CLS = 0.05 (passes)
Mobile Performance & User Experience
As mobile browsing dominates internet consumption in 2024, compressed images ensure that websites are mobile-friendly, catering to users’ expectations for quick-loading pages, regardless of their device or network conditions.
Mobile networks (4G, 5G) are slower than desktop networks. Image optimization is 3-5x more important on mobile.
User experience impact:
- Slow-loading images = higher bounce rate (especially on mobile)
- Fast-loading images = higher engagement, more pages viewed
- This directly improves time-on-site, a ranking signal
Real-World Performance Examples
Example 1: News Website
- Original: 800KB total images per page (15 images, unoptimized)
- Optimized: 180KB total images per page (same 15 images, Optimizilla + resizing)
- Result: LCP improved from 5.2s to 1.9s, Core Web Vitals passed
Example 2: E-Commerce Store
- Original: 3.2MB product images per page (unoptimized)
- Optimized: 650KB product images per page (Optimizilla + proper format)
- Result: Conversion rate increased 8%, bounce rate decreased 12%
Example 3: Blog
- Original: 500KB hero images + featured images (unoptimized)
- Optimized: 120KB total images (Optimizilla)
- Result: Ranking improved for 200+ existing articles within 4 weeks
Integrating Optimizilla Into Your Image Optimization Workflow
Optimizilla is a manual tool, but you can build systems around it.
Automated Workflows (Developer Tips)
If you handle images programmatically, don’t rely on Optimizilla alone. Use APIs:
- ImageMagick (command-line)
- FFmpeg (video/image)
- Node.js sharp (JavaScript)
Example workflow:
- User uploads image to your website
- Backend automatically resizes to 3 sizes (mobile, tablet, desktop)
- Backend compresses each size using sharp or ImageMagick
- Optimized images stored on CDN
This is faster than Optimizilla for high-volume sites.
Batch Processing for Large Sites
If you’re optimizing 100+ existing images:
- Audit: Identify largest, unoptimized images using:
- Google PageSpeed Insights (shows image sizes)
- Chrome DevTools (Network tab)
- GTmetrix (shows image list)
- Prioritize: Compress highest-impact images first
- Hero images (appear on many pages)
- Product images (ecommerce)
- Featured images (all pages)
- Batch with Optimizilla:
- Download 20 images
- Upload to Optimizilla
- Download compressed batch
- Upload compressed versions to server
- Repeat until complete
- Verify: Test Core Web Vitals improvement after each batch
Format Selection Strategy
Decision tree:
- Is it a photograph? → Use JPEG
- Is it a logo, icon, or graphic? → Use PNG
- Can you use modern formats? → Use WebP (requires conversion tool)
- Does it have transparency? → Use PNG (or WebP)
For Optimizilla specifically:
- Compress JPEG to 70-75% quality
- Keep PNG at lossless (100% quality)
- Don’t bother with GIF
Responsive Image Best Practices
Optimizilla can’t resize images, but you can:
html
<!-- Serve different image sizes based on device -->
<img
  src="image-desktop.jpg"
  srcset="image-mobile.jpg 600w,
          image-tablet.jpg 900w,
          image-desktop.jpg 1400w"
  sizes="(max-width: 600px) 600px,
         (max-width: 900px) 900px,
         1400px"
  alt="Description">
Workflow:
- Create 3 versions of each image: 600px, 900px, 1400px
- Compress each version with Optimizilla
- Use srcset to serve correct size
- Users on mobile get 600px version (60% smaller file)
Common Mistakes That Waste Optimization Efforts
Even with the right tool, people make expensive mistakes.
Over-Compression & Visible Quality Loss
Mistake: Setting compression to 40-50% quality to minimize file size.
Result: Visible artifacts, reduced trust, worse conversion rates.
Fix: Test on actual devices. If quality loss is visible, increase compression level.
Ignoring Format Specifications
Mistake: Using PNG for all photographs.
Result: Files are 2-3x larger than necessary (PNG can’t compress lossy).
Fix: Use JPEG for photos, PNG for graphics.
Not Resizing Before Compression
Mistake: Uploading a 3000x2000px image to Optimizilla when it displays as 800x533px.
Result: Unnecessary file size (compression can’t fix oversized dimensions).
Fix: Resize images to actual display width before compressing. Optimizilla can’t do this.
How to resize:
- Online: canva.com, pixlr.com, photopea.com
- Software: Photoshop, GIMP
- Command-line: ImageMagick
Forgetting Alt Text & Image Metadata
Mistake: Compressing images but not adding alt text.
Result: Images aren’t indexed by Google, invisible to search.
Fix: Add alt text:
html
<img src="image.jpg" alt="Description of what image shows">Quick-Start Checklist: Image Optimization Best Practices
Use this checklist before deploying any image.
Pre-Compression Steps
- Resize image to actual display width (don’t upload oversized images)
- Choose correct format (JPEG for photos, PNG for graphics)
- Remove unnecessary metadata (EXIF data, color profiles)
Compression Settings by Use Case
- Hero/featured image: 75-80% quality, target 60-120KB
- Product image: 75-80% quality, target 50-100KB
- Blog post image: 70-75% quality, target 40-80KB
- Thumbnail: 60-70% quality, target 10-25KB
- Logo/icon: Lossless, target 10-30KB
Post-Compression Validation
- Check for visible compression artifacts (zoom in)
- Test on mobile device (actual device, not just browser)
- Verify Core Web Vitals improvement (use PageSpeed Insights)
- Add alt text before uploading to site
- Set image dimensions in HTML (prevents layout shift)
FAQ
Q1: Can I use Optimizilla without uploading images to a server?
A: Yes. Optimizilla is client-side (processes on your device). No images are stored on their servers. Download immediately after compression.
Q2: Does Optimizilla work on mobile?
A: Yes, but uploading/downloading files on mobile is more difficult. Desktop experience is better.
Q3: What’s the difference between the quality slider and compression percentage?
A: The quality slider controls lossy reduction (0-100%). Higher = more quality/larger file. Lower = less quality/smaller file.
Q4: Can I batch compress 200 images at once?
A: No, max 20 per batch. You can process 200 images in 10 batches (reloading between each).
Q5: Does image compression hurt SEO?
A: No. Understanding the basics of SEO and image optimization is essential for any business looking to improve their online visibility and user experience. Proper compression improves SEO.
Q6: How much file size reduction is typical?
A: JPEG: 40-80% reduction (depends on original size and quality). PNG: 10-30% reduction (lossless).
Q7: Should I compress all images to the same quality level?
A: No. Use different settings for different image types (see table above). Small thumbnails can be more aggressive than hero images.
Q8: Does Optimizilla support WebP format?
A: No. It only handles JPEG, PNG, GIF. For WebP, use TinyPNG, Kraken, or other tools.
Q9: Can I automate Optimizilla compression?
A: No API available. It’s a manual tool. For automation, use command-line tools (ImageMagick, sharp).
Q10: Is it safe to compress images multiple times?
A: With lossy compression (JPEG), yes once. With lossless (PNG), multiple compressions are safe but unnecessary.
Q11: What’s the best format for website images in 2024?
A: WebP (best compression), JPEG (good compression, wide support), PNG (no compression loss). Optimizilla handles JPEG/PNG. Use other tools for WebP.
Q12: How do I know if compression is too aggressive?
A: Test on actual devices. Look for: color banding in gradients, halos around edges, visible pixelation, fuzzy text. If visible, increase quality.