Perfect. I now have the insights needed to create a comprehensive article that beats current rankings. Let
Converting an image from PNG to JPG seems simple on the surface: pick a format, click a button, download your file. But that simplicity masks a complex decision with real consequences for image quality, file size, compatibility, and professional workflows.
Here’s the problem most people don’t realize: converting PNG to JPG isn’t just about changing a file extension. It’s about fundamentally changing how your image is stored, compressed, and displayed. Make the wrong choice, and you could destroy months of photography work. Make the right choice, and you’ll optimize for web, reduce storage needs, and maintain image fidelity where it matters most.
This guide cuts through the confusion. You’ll learn exactly when conversion makes sense, what quality loss actually looks like, how to avoid common mistakes, and when you should skip conversion entirely.
Understanding the Fundamental Difference Between PNG and JPG
These two formats are not simply different versions of the same thing. They’re built on completely different philosophies about how images should be stored.
What PNG Actually Does (Lossless Compression Explained)
PNG stands for Portable Network Graphics. It was created in 1995 as a free, open-source alternative to GIF, specifically designed to handle both transparency and color depth without any quality loss.
Here’s what “lossless” means in practical terms: PNG uses a compression algorithm (LZW compression) that analyzes your image and finds ways to represent the same data using fewer bytes, but it never throws away any actual image information. It’s like zipping a folder on your computer—the files get smaller, but when you extract them, they’re identical to the original.
What this means for your images:
- Every pixel remains exactly as it was in the original
- You can open, edit, and save a PNG hundreds of times without quality degradation
- Sharp edges stay sharp. Colors remain vibrant. Details persist.
- File sizes stay relatively large because the algorithm only compresses so much
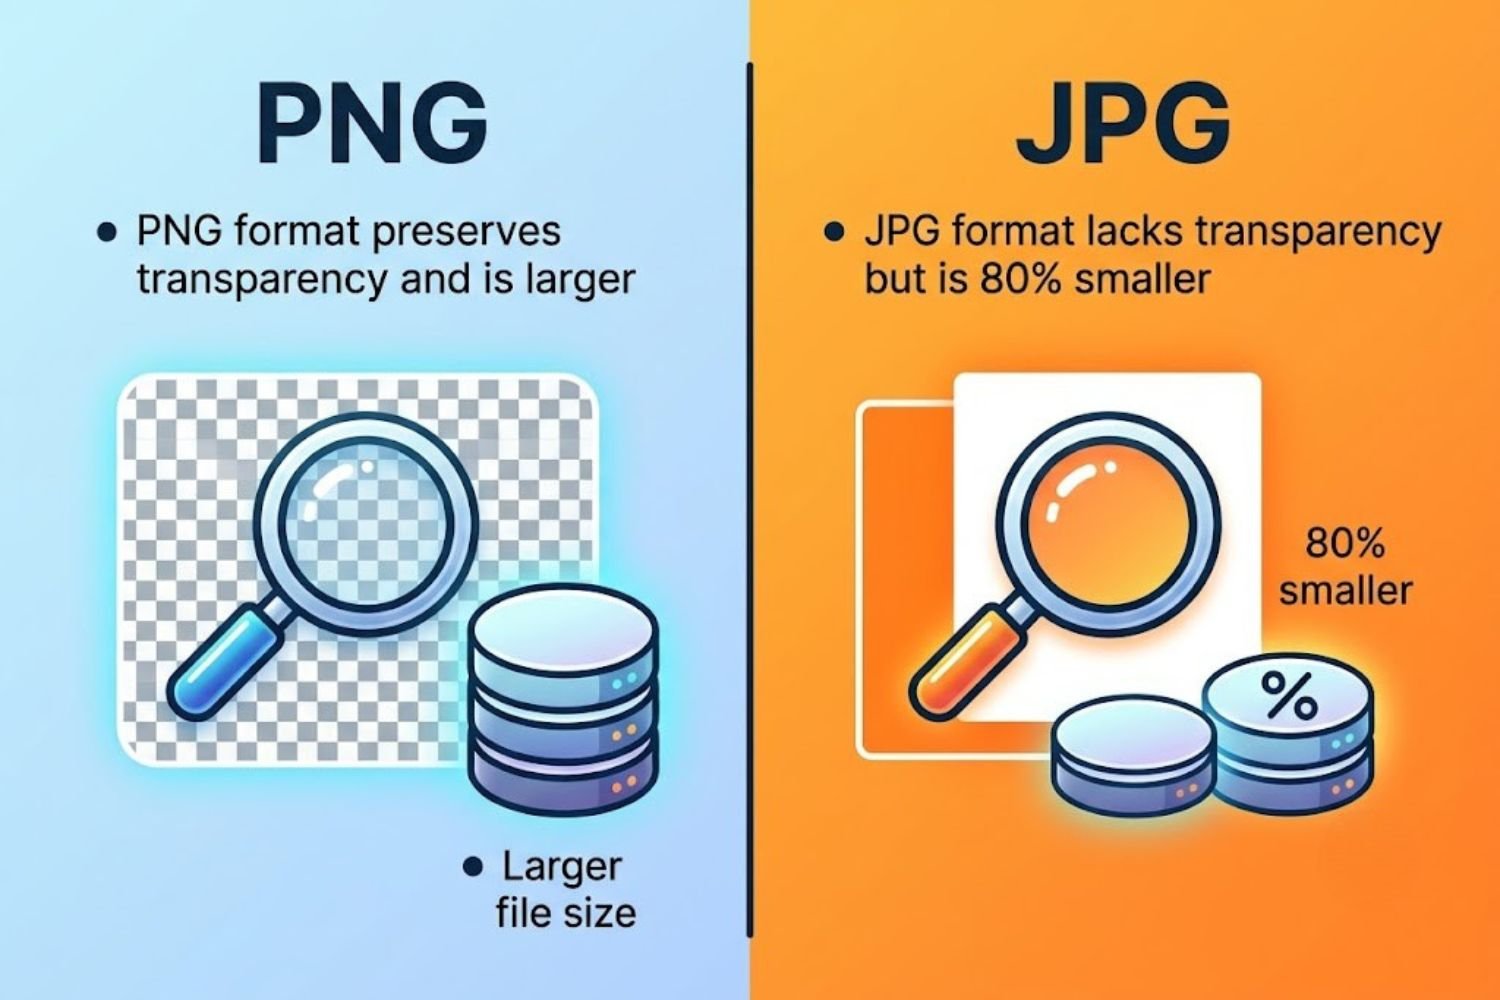
PNG also supports transparency—both full transparency (completely see-through areas) and partial transparency (semi-transparent edges). This is crucial for logos, icons, and images that need to sit cleanly on any background.
What JPG Actually Does (Lossy Compression Explained)
JPG (also called JPEG, which stands for Joint Photographic Experts Group) was created in 1992 specifically for compressing photographs. It uses a fundamentally different approach called lossy compression.
Lossy compression works by identifying which details in your image your eye is least likely to notice, then permanently removing that data. The JPG algorithm examines your image, finds subtle color variations and fine details, and deletes them. The result: dramatically smaller files—often 80-90% smaller than the PNG equivalent.
The critical part: This data loss is permanent. Once you save as JPG, those deleted details are gone forever. If you open that JPG and save it again as JPG, the algorithm runs again, discarding more data in a process called “generation loss.”
Visual Comparison: Where the Differences Show Up
The difference between PNG and JPG is most visible in:
- Photographs with gradual color transitions: JPG handles these extremely well, often with no visible quality loss to human eyes
- Graphics with sharp edges and text: PNG preserves crisp lines perfectly; JPG can introduce subtle blurring or artifacts around text
- Images requiring transparency: PNG supports this; JPG does not
- Images you’ll edit repeatedly: PNG maintains quality across edits; JPG degrades with each save
File Size Reality: The Numbers That Matter
Here’s what the numbers actually look like:
A typical high-resolution photograph:
- PNG version: 8-12 MB
- JPG version (high quality): 1-2 MB
- Reduction: 80-85% smaller
A graphic with text and transparency:
- PNG version: 500 KB
- JPG version: 150 KB (but loses transparency and introduces artifacts around text)
A screenshot or document:
- PNG version: 2-5 MB
- JPG version: 500 KB-1.5 MB (but loses sharpness on text)
When Should You Actually Convert PNG to JPG?
This is where most guides fall short. They say “convert for web” or “convert for storage,” but that misses the nuance. The real question is: should your specific image be converted?
Convert to JPG If You Have These Use Cases
Photographs and Continuous-Tone Images
If your image is a photograph with millions of colors and gradual transitions between tones, JPG is genuinely the better choice. The human eye can’t detect the data JPG removes from photos. A JPG photo and its PNG equivalent look identical to most viewers, but the JPG is a fraction of the file size.
This applies to:
- Professional photography for web galleries
- Product photography for e-commerce
- Travel photos for sharing online
- Portrait photography for portfolio sites
- Any image with natural lighting and color gradients
Web Performance is a Priority
If your website speed matters—and it does, because Google ranks faster sites higher—JPG conversion makes sense for photographic content. Smaller files mean faster page loads, better Core Web Vitals scores, and improved user experience on mobile connections.
The performance gain is substantial: a 10 MB PNG that becomes 1 MB as JPG can reduce page load time by 2-3 seconds on mobile networks.
File Storage Matters
If you’re managing hundreds or thousands of photographs, storage costs accumulate. Converting PNGs to JPG reduces storage needs by 80%+. For photographers managing cloud backups or servers with bandwidth constraints, this is a real financial consideration.
Compatibility Across Devices
JPG is supported literally everywhere—every phone, tablet, computer, and browser created in the last 20 years. PNG is also widely supported, but JPG’s universality means zero compatibility concerns.
Do NOT Convert If You Need Transparency
This is non-negotiable: JPG does not support transparent backgrounds. If you need any part of your image to be see-through or semi-transparent, converting to JPG is not an option.
Scenarios where you absolutely need PNG:
- Website logos that need to sit on different background colors
- Product images that need see-through areas
- UI elements and app icons
- Graphics layered over photographs
- Any image with see-through edges or semi-transparent effects
The Transparency Problem (And Why It Matters)
When you convert a PNG with transparency to JPG, the converter has to fill those transparent areas with a solid color (usually white or your chosen background color). This creates a white box around your logo or graphic, breaking your design and requiring workarounds.
If you’ve ever seen a logo that appears to have a white rectangle around it on a colored webpage, that’s a PNG-to-JPG conversion gone wrong.
Quality Loss: What Really Happens When You Convert
Understanding how quality loss actually works helps you make better decisions.
Generation Loss Explained (And Why It Compounds)
Generation loss is what happens when you save a JPG, then open and save it again. The JPG algorithm runs a second time, removing more data. Each generation introduces visible degradation.
Here’s the real-world impact:
- 1st save: Undetectable loss for photographs
- 2nd save: Still mostly undetectable
- 3rd save: Slight artifacts may appear
- 5th+ saves: Visible quality degradation, color banding, loss of fine detail
This is why professionals follow this workflow:
- Keep original as PNG or RAW
- Edit the PNG/RAW version
- Export to JPG only as the final step
- Never open and re-save a JPG as JPG
If you need to edit a JPG multiple times, convert it to PNG first, edit the PNG, and export to JPG at the end.
What You’ll Actually Notice in Converted Images
Quality loss isn’t always obvious. Here’s what to look for:
- Halos around sharp edges: A thin dark or light line appears around text or objects
- Color banding: Gradual color transitions break into visible bands instead of smooth gradients
- Mosquito noise: Tiny colored dots appear around contrasting areas
- Loss of texture: Fine texture details become smooth and unnatural
- Blurred edges on text: Any text in the image becomes softer, less crisp
For photographs, these artifacts are usually invisible at normal viewing sizes. For graphics, text, or illustrations, they’re often noticeable.
The Compression Algorithm: Where Quality Escapes
JPG uses DCT (Discrete Cosine Transform) compression, which breaks your image into 8×8 pixel blocks and compresses each block separately. This is extremely efficient for photographs but problematic for images with sharp lines because each block is compressed independently.
Quality settings (typically 1-100 or 0-12 depending on your tool) control how aggressively the algorithm compresses. A quality setting of 85-90 is generally considered “high quality” for JPG—visually identical to the original for most photographs but still achieving 5-8x file size reduction.
Setting quality too low (below 70) introduces obvious artifacts. Setting it higher than 90 often provides negligible quality improvement while dramatically increasing file size.
Can You Really Preserve Quality? The Honest Answer
Yes, but with caveats.
You can convert PNG to JPG and maintain visual quality for photographs by:
- Using quality settings of 85-90
- Converting only once (not repeatedly)
- Converting only photographs, not graphics
- Exporting straight from your editor if possible
You cannot preserve quality for:
- Graphics with sharp lines or text
- Images with transparency
- Illustrations or artwork
- Screenshots
- Any image you’ll edit multiple times
Decision Framework: PNG vs JPG
Let’s move past general advice. Here’s how to decide for your specific situation.
For Photographers
Use JPG for:
- Final, finished photographs shared online
- Web galleries and portfolio sites
- Social media uploads
- Printed web images
Use PNG for:
- RAW processing workflow (export from Lightroom/Capture One as PNG)
- Photographs you’re actively editing
- Archival/backup copies of original work
- Photography where transparency is needed (rare)
Workflow recommendation: Export from your editor directly to JPG at quality 85-90 as your final step. Keep the editor’s native file (PSD, Lightroom catalog, etc.) as your master.
For Web Designers
Use JPG for:
- Hero images and large background photographs
- Photography-based content blocks
- Any image with continuous tones and gradients
Use PNG for:
- Logos and brand elements
- Icons and UI components
- Graphics requiring text overlay or transparency
- Screenshots and wireframes
Alternative to consider: WebP format offers PNG-quality transparenc with JPG-level compression. Browser support is now 96%+ globally.
For E-commerce Managers
Use JPG for:
- Product photography (the primary product image)
- Lifestyle/context photography
- Background images
- Gallery thumbnails
Use PNG for:
- Product images requiring white/transparent backgrounds
- Icons, badges, and promotional graphics
- Any image needing transparency
Critical consideration: Batch convert product photos to JPG at quality 85-90. This can reduce your product image library from 500 GB to 100 GB while maintaining visual quality.
For Content Creators
Use JPG for:
- Photographs in blog posts or articles
- Shared social media images
- Any published, final content
Use PNG for:
- Images you’re creating or editing
- Screenshots that include text or UI elements
- Infographics and illustrations
- Working files you’ll modify later
Rule of thumb: Convert to JPG only as your absolute final step before publishing.
The Quality-vs-Speed Tradeoff Table
| Use Case | Format | Quality Setting | File Size | Speed | When to Use |
|---|---|---|---|---|---|
| Photography | JPG | 85-90 | 1-2 MB | Fast | Most common case |
| Photo (budget-conscious) | JPG | 75-80 | 0.5-1 MB | Fastest | High-volume scenarios |
| Photos (archive) | PNG | N/A | 8-12 MB | Slowest | Preservation/editing |
| Graphics + Text | PNG | N/A | 0.5-1 MB | Slow | Always better than JPG |
| Logos/Icons | PNG | N/A | 50-200 KB | Slow | Transparency essential |
| Screenshots | PNG | N/A | 2-5 MB | Slow | Readability important |
How to Convert PNG to JPG Without Destroying Quality
If you’ve decided conversion is right for your use case, here’s how to do it properly.
Step 1: Assess Your Original Image
Before converting, ask:
- Is this a photograph or a graphic?
- Does it need transparency?
- Will I edit this image again?
- What’s my target file size?
If it’s a graphic with text or needs transparency, stop—don’t convert.
Step 2: Choose the Right Tool
For occasional conversions: Use an online converter like Zevaan.pk, Adobe Express, or Pixelied. They’re free, require no installation, and handle single or batch conversions.
For batch conversions: Use desktop software like ImageMagick (command line), Adobe Lightroom, or Capture One if you’re converting hundreds of images.
Quality consideration: Online converters using browser-based processing are generally safe for single conversions. For professional work, use desktop software where you control quality settings directly.
Step 3: Configure Quality Settings
For photographs:
- Set quality to 85-90 for web use
- Set quality to 90-95 for professional/print work
- Anything above 95 provides minimal visible improvement
For graphics converted to JPG (not recommended, but if you must):
- Use quality 90+ to minimize artifact visibility
- Accept that you’ll still see halos around edges
Pro tip: Test your quality setting on a small batch first. View at 100% zoom on screen to see actual artifacts before converting your entire library.
Step 4: Process Your Conversion
Single image: Use online converter or desktop app. Upload → Set quality → Download.
Multiple images: Use batch conversion. Most tools can process dozens simultaneously.
Large batches: Use command line (ImageMagick):
convert input.png -quality 85 output.jpg
Or for entire directories:
mogrify -format jpg -quality 85 *.png
Step 5: Verify the Result
After conversion:
- Download/save the JPG
- Open it in your image viewer
- Zoom to 100% and examine for artifacts
- Compare with original if possible
- Check file size meets your target
If you see excessive artifacts or quality is worse than expected, adjust quality setting up by 5-10 points and reconvert.
Step 6: Pro Tip—Batch Processing Without Sacrificing Quality
If you’re converting hundreds of images:
- Test on 5-10 representative samples first
- Use quality 85 as starting point
- Monitor file sizes and quality
- Adjust settings if needed
- Document your settings for consistency
Batch processing identical images with identical settings ensures consistency across your entire library.
Common Mistakes That Damage Image Quality
Mistake #1: Converting Already-Compressed Images
Never convert a JPG that’s already been compressed to PNG and back to JPG. You’re layering compression on top of compression, introducing artifacts at each step.
Right workflow: Original (PNG) → Edit → Export to JPG one time
Wrong workflow: Original (PNG) → Export JPG → Open JPG → Edit → Export JPG again
Mistake #2: Ignoring Quality Settings
Using default quality settings without understanding them wastes either quality or file size.
Scenario: You set quality to 100 thinking “maximum quality,” but you achieve a 1.5 MB JPG that looks identical to a 500 KB version at quality 85.
Fix: Test your quality settings and find the sweet spot where visual quality meets file size goals.
Mistake #3: Converting Graphics With Text
JPG introduces artifacts around text and sharp edges. Screenshots, infographics, and graphics with text should stay as PNG.
The visual result: Text appears soft, blurry, or has colored halos around it.
Fix: Leave graphics as PNG unless file size is genuinely critical and slight text softness is acceptable.
Mistake #4: Losing the Original PNG
Never convert PNG to JPG and delete the PNG. You’ve now locked yourself into that quality level forever.
Better practice: Convert PNG → JPG for web use, but keep the original PNG as your master file for future edits or higher-quality exports.
This is especially important for professional work or images you might want to repurpose later.
Mistake #5: Assuming All JPG Quality Settings Are Equal
Different tools measure quality differently. One tool’s “quality 80” might be another tool’s “quality 60.”
Reality: Always preview the result before committing to a batch conversion.
Web Performance: Why File Size Actually Matters
Converting PNG to JPG for web isn’t just about storage efficiency. It’s about user experience and search engine rankings.
Page Load Speed and User Experience
A 10 MB PNG image that becomes 1 MB as JPG reduces page load time by approximately 2-3 seconds on a 4G mobile connection.
This matters because:
- Users abandon slow sites: A 3-second delay increases bounce rate by 40%
- Google measures this: Core Web Vitals include page speed as a ranking factor
- Mobile experience suffers: High-bandwidth users see the speed difference; low-bandwidth users see a massive difference
SEO Implications of Large Image Files
Google’s Core Web Vitals now include loading speed, visual stability, and interactivity. Large image files hurt all three metrics.
Converting photographs from PNG to JPG improves:
- LCP (Largest Contentful Paint): Faster image loading
- CLS (Cumulative Layout Shift): Smaller images load faster, preventing layout shifts
- INP (Interaction to Next Paint): Faster page responsiveness
Mobile User Experience Considerations
Mobile users on 3G connections experience the most dramatic difference. A 10 MB image can take 30+ seconds to load on 3G. The same image at 1 MB loads in 3-4 seconds.
For e-commerce and content sites targeting mobile users, JPG conversion directly impacts conversion rates.
When to Use WebP Instead (Modern Alternative)
WebP is a newer format that provides PNG-level quality with JPG-level file sizes. Browser support is now 96%+ (Safari added support in 2024).
Consider WebP if:
- You want transparency with JPG-level compression
- You’re using modern infrastructure (most hosting supports WebP)
- You want best of both worlds
Serve WebP with JPG fallback:
- Modern browsers get WebP (best quality/size ratio)
- Older browsers get JPG (universal compatibility)
- Users benefit from optimal performance
Alternative Solutions Before You Convert
PNG Optimization Techniques
Before converting PNG to JPG, try optimizing your PNG:
Tools: TinyPNG, ImageOptim, PNGQuant
Result: 20-40% file size reduction without quality loss
Time: Seconds per image
If optimization gets your file to acceptable size, you’ve avoided conversion and kept all the benefits of PNG (transparency, lossless quality).
Should You Use WebP Instead?
WebP offers:
- PNG transparency support
- JPG-level compression (often better than JPG)
- Smaller files than either PNG or JPG
- Modern browser support (96%)
For professional work: Serve WebP to modern browsers, PNG/JPG to others.
For casual use: If all your audience uses modern browsers, WebP is superior to both PNG and JPG.
When to Use Other Formats
- TIFF: Professional printing and archival (very large files)
- GIF: Animations only (outdated for static images)
- AVIF: Newest format, even smaller than WebP, but browser support still growing (90%)
- HEIC: Apple ecosystem primarily, not recommended for web
Tools and Methods for Converting PNG to JPG
Online Converters (Browser-Based)
Best options:
- Zevaan.pk: Free, batch conversion, quality controls, privacy-focused (no file storage)
- Adobe Express: Free with optional premium, integrates with Adobe ecosystem
- CloudConvert: Supports 200+ formats, batch processing, quality settings
Advantages:
- No installation required
- Works on any device
- No software bloat
- Immediate processing
Disadvantages:
- Dependent on internet connection
- File upload/download bandwidth needed
- Less control over settings in some tools
Desktop Applications
ImageMagick: Free, open-source, command-line tool with advanced control
convert input.png -quality 85 -strip output.jpg
Adobe Lightroom: Professional photography workflow, batch conversion, quality presets
Capture One: Professional RAW processor, excellent JPG export quality
IrfanView: Lightweight, free Windows tool with batch conversion
Advantages:
- Full control over settings
- Batch processing entire folders
- No upload/download delays
- Works offline
Disadvantages:
- Requires installation
- Steeper learning curve
- Local storage requirements
Command-Line Solutions (For Technical Users)
ImageMagick (Linux, macOS, Windows):
convert input.png -quality 85 output.jpg
For batch processing:
mogrify -format jpg -quality 85 -strip *.png
FFmpeg (advanced users):
ffmpeg -i input.png -q:v 5 output.jpg
Advantages:
- Extremely fast
- Scriptable for automation
- No graphical UI overhead
- Works in cloud environments
Disadvantages:
- Requires technical knowledge
- No visual preview
- Difficult for non-technical users
Batch Conversion Strategies
Small batch (1-50 images): Use online converter with batch upload
Medium batch (50-500 images): Use desktop application with batch folder processing
Large batch (500+ images): Use ImageMagick with shell script or hire professional processing
Strategy:
- Process small sample batch
- Verify quality settings produce acceptable results
- Document exact settings
- Process full batch with identical settings
- Spot-check results
Metadata Considerations You’re Probably Missing
What Happens to EXIF Data
EXIF (Exchangeable Image File Format) data contains camera settings, location, date, photographer, copyright, and other metadata embedded in image files.
PNG files: Can store EXIF but rarely do
JPG files: Support EXIF natively
When you convert PNG to JPG: Any metadata in the original is often lost
When you convert JPG to JPG: EXIF data may be preserved or stripped depending on your tool
Why Metadata Matters for Professional Work
For professional photographers:
- EXIF data proves date/time of original capture
- Camera settings provide technical reference
- GPS location data enables location-based workflows
- Copyright information protects intellectual property
Losing metadata means losing professional context and potential legal protections.
How to Preserve Important Image Information
Best practice:
- Export from your editor with metadata intact
- Use conversion tools that preserve EXIF (most modern ones do)
- Verify metadata after conversion using EXIF viewer
- Store original files with metadata for archive
Tools that preserve metadata:
- Adobe Lightroom (export maintains EXIF)
- ImageMagick (use without
-stripflag) - Most modern online converters
FAQ Section
Q: Will converting PNG to JPG lose quality?
A: For photographs, minimal quality loss at settings 85+. For graphics, text, and images with sharp edges, quality loss is visible. Transparency is lost entirely.
Q: What quality setting should I use?
A: 85-90 for photographs (standard web use), 90-95 for professional work. Test on samples before batch converting.
Q: Can I convert JPG back to PNG without quality loss?
A: No. JPG data is permanently lost. Converting JPG to PNG simply wraps already-compressed data in a PNG container. Quality remains degraded.
Q: Should I convert all my PNG images to JPG?
A: Only if they’re photographs and you need to reduce file size. Convert graphics, images with text, or images needing transparency.
Q: Does file size matter for websites?
A: Yes. Large images slow page load, hurt SEO rankings, and increase bounce rates. Converting PNG to JPG typically reduces size 80-90%.
Q: What’s the best online converter?
A: Look for tools offering quality control, batch processing, and privacy-focused storage (files deleted after conversion). Zevaan.pk, Adobe Express, and CloudConvert are reliable.
Q: Can I edit a JPG and save it as JPG without quality loss?
A: Each time you save JPG as JPG, quality degrades (generation loss). Edit PNGs or original files, export to JPG once at the end.
Q: What if I need transparency with smaller file size?
A: Use WebP format (supports transparency, 25-35% smaller than PNG). Serve to modern browsers, PNG fallback for older browsers.
Q: How do I batch convert 1000s of images?
A: Use ImageMagick (command-line), desktop software (Lightroom, Capture One), or hire professional processing. Online converters work for smaller batches.
Q: Will my JPG look the same as the PNG?
A: For photographs at quality 85+, yes, imperceptibly different to human eyes. For graphics, text, or images with sharp edges, quality degradation is visible.
Q: What’s the best workflow for professional photography?
A: Original file (RAW/PNG) → Edit in Lightroom/Capture One → Export to JPG (quality 85-90) as final step. Keep original.
Q: Should I use quality 100?
A: No. Quality above 90 provides minimal visible improvement while dramatically increasing file size. Quality 85-90 is the sweet spot.
Q: What if my PNG has a white background that becomes transparent when I convert to JPG?
A: JPG doesn’t support transparency. The converter fills transparent areas with a solid color (usually white). This is a major problem for logos. Keep these as PNG.
Q: Can I convert PNG to JPG on my phone?
A: Yes. Apps exist for iOS and Android. Online converters also work on mobile browsers.
Q: What’s generation loss and why should I care?
A: Each time you save a JPG as JPG, quality degrades further (generation loss). Avoid editing and re-saving JPGs. Always start with PNG/original.
Key Takeaways
- PNG uses lossless compression (no data lost), JPG uses lossy (data permanently deleted to reduce size)
- File size reduction is dramatic: JPGs are typically 80-90% smaller than PNGs for photographs
- Quality loss is permanent: Converting once is usually fine; converting repeatedly causes visible degradation
- Transparency is lost: Converting PNG to JPG removes all transparency and replaces it with solid background color
- Quality settings matter: Use 85-90 for web, 90-95 for professional work
- Best workflow: Keep original as PNG/RAW, edit, export to JPG once as final step
- Transparency requirement? Keep as PNG or use WebP (modern alternative with both transparency and compression)
- Generation loss compounds: Never open and re-save a JPG as JPG; converts accumulate damage
- Graphics and text: Stay PNG; JPG introduces visible artifacts around sharp edges and text
- Professional work: Preserve metadata by using tools that maintain EXIF data during conversion
- Web performance matters: Converting large PNGs to JPG improves page speed, SEO rankings, and mobile experience